

Here was our inspiration for the walls:
These images are from one of the Fritz Hansen furniture galleries. Love the chevron inspired geometric wall! It has a mid-century modern vibe too. We want all of this up in here.
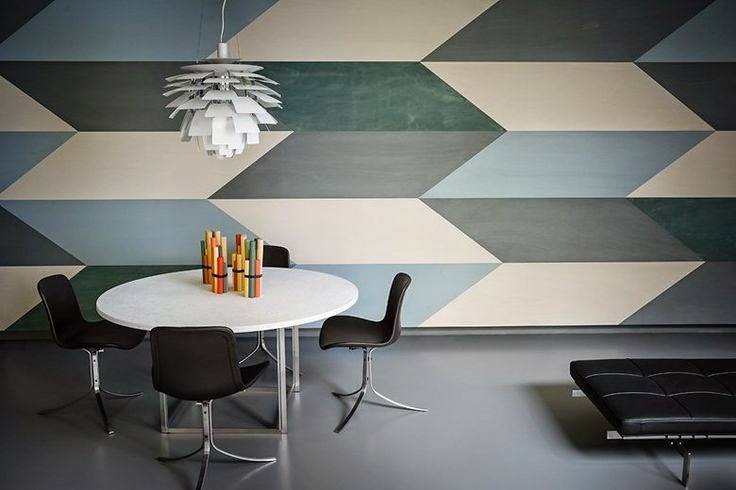
This wall is actually a mosaic of different colored wooden parallelograms. But for our wall we used 5 different colors of paint and A LOT of time and tape.
The colors were inspired by Resonate Church's logo:

Here's how we did it:
Step 1: Choose colors. We chose 2 grays, 2 greens, and 1 white that all worked well together. All Valspar paint.

Step 2: Sketch it out on paper. Doing this on a small scale will help you execute the large wall so much faster. You won't have to second guess the pattern. (Although if you're like me and accidentally paint a shape the wrong color, you may have to make another sketch!)

Step 3: Measure & mark the wall. Using a measuring tape, level & pencil, carefully (& lightly) draw the shapes on the wall.
Step 4: Mark each piece. To save time, put a dab of each color in their respective places on the wall. This way you won't have to constantly refer back to your graph each time. (The pic below was mid-project, but you can see "dab marks" for the deeper green.)

Step 5: Tape and Paint by Number. Repeat. This takes some time! Put on some good music and tune into the perfectionist in you. Work with one color at a time, taping the outside of that color's shapes. Each color takes 2-3 coats. Remove the tape carefully. If needed, score along the tape edge with an exacto knife to keep the edges clean. Wait until each color is dry before gently taping over it for the neighboring color! This process took a few hours for an 8'6" x 8' wall. But once you get going, you can touch up paint other areas while the current color is drying.

Step 6: Touch up. With this much painting, there will inevitably be touch ups needed. The better you clean up your lines and corners, the sharper your pattern will look. (Below you can see a white gap that needed touching up.)

And here is the final result of the wall in our small 8 1/2 foot wide conference room:


We love this fresh geometric take on the chevron. So graphic!

How did you decide what color each parallelogram should be. I cannot find a pattern in your picture. I am trying to recreate my own version of a wall like this using different colors and I’m having a hard time coloring my sketches.
ReplyDeleteHi Megan, Mine had no pattern and was pretty random. But with 5 colors (2 greens, 2 grays, white), I just made sure that none of the same colors were touching. I also used white more than any other color, to break up any large color blocks. I had to sketch a few different combos too. Good luck, I'm sure it'll be great!
Delete