

Remember these two freshly spray painted urns from last week's post? Well, I'm finally showing you how I topped them off with some moss. Its a perfect solution for March - a bit of green for the porch - while I wait for warmer flower weather. And it only cost me about $4.

The supplies you'll need for this project are:
- An outdoor container - urns or pots, etc.
- Moss (I used floral moss & Spanish moss - both at are Walmart for about $2 per bag)
- Paper bag or brown craft paper
- Plastic bags
- Hot glue gun and a few hot glue sticks

Step 1. Make a Mound. Start by filling your urns or pots with enough plastic bags to have a nice "mound" on top. I used plastic bags (that we usually reuse for garbage) because they are water proof and won't get soggy or fall apart in the weather.
Step 2. Cover the Mound. Use brown craft paper (or a paper bag will do) to cover the plastic mound. Why? The moss will be glued down to this surface - and the plastic bags would melt. Also its more natural looking than the bright white of the plastic bags, so it won't show through the moss as easily. Other bonus: If you ever dampen your moss (to keep it green) the paper will help hold the moisture.

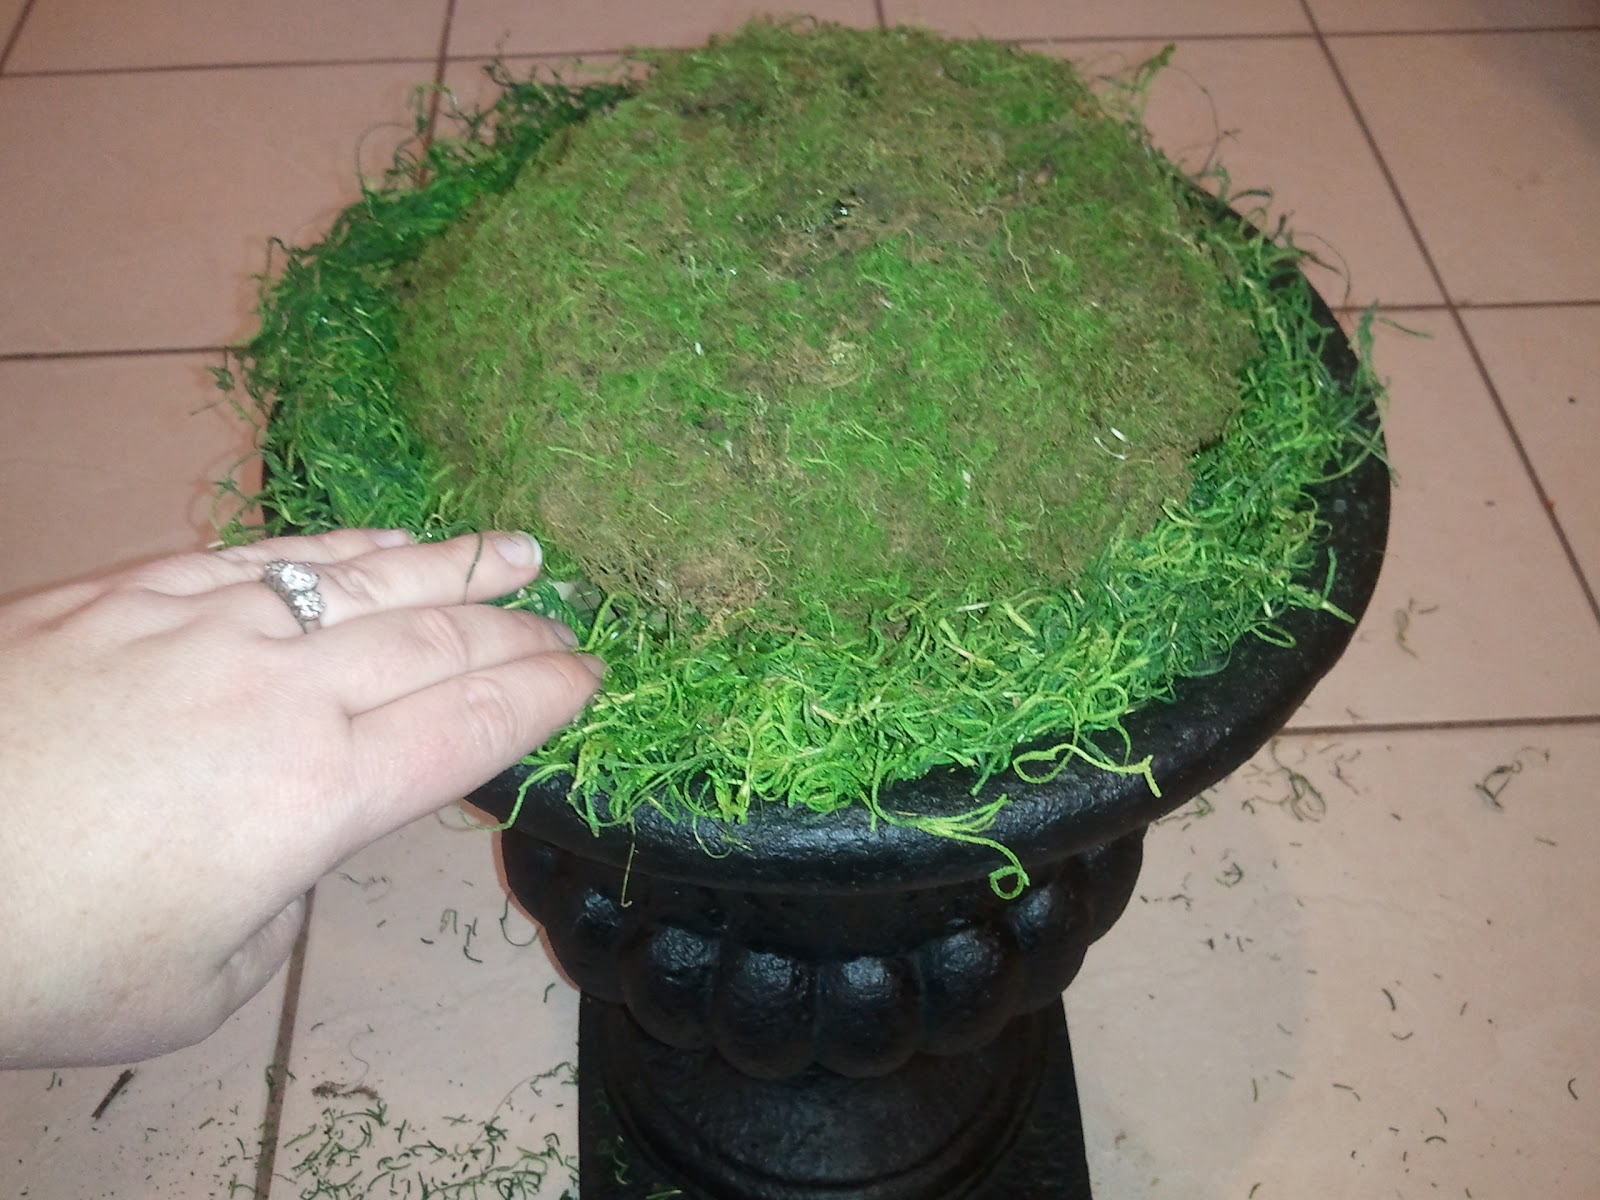
Step 3. Add Floral Moss. I centered the floral moss and used my hot glue gun to secure it down. In some spots, I added two layers of moss, for a more natural, lumpy, mossy look. Don't worry too much about any exposed edges. The Spanish moss will cover it.

Step 4. Tuck in Spanish Moss. I used Spanish Moss around the edges to add a bit more interest and texture. Plus it softens the edges around the urn. I used a combination of tucking it in and hot gluing it. Make sure you cover all the brown paper around the edges.
And you're done! Here's a little peak of the two completed moss filled urns before I put them on the porch. A little note if you're doing more than one container: I put them side-by-side to make sure they both looked similar. I didn't want one to be more "mounded", or dripping with moss than the other.

I'll have completed porch pictures for you tomorrow (hopefully the weather will be better). I'll also show you a few other touches o' green that I've added around the house. Just in time for St. Patrick's Day!
No comments:
Post a Comment