
Ah, fresh starts! With January well underway and the adoption of our sons complete (yeah!), its the start of a new season for us. Like taking in a deep breath of fresh new air, this January feels invigorating to me! I'm sure I will blog about deeper things soon and even a little about our foster-adoption (after I process it a bit more). But for now, I can finally dream about our house again and start planning projects. I have lots of low-cost/high-impact projects to share with you!
So for the month of January, I will be posting updated pictures of our "new" 1930s home. We moved in over a year ago, but I've barely posted anything about it. So without further ado, here are before and during/after pics of our sweet little cottage, "Pioneer Heights":
The Living Room
So far we have done only $45 worth of updates to this central space. But it has made a big difference and the room feels more like "us" now. Here are the projects broken down:Before - Focal Wall
The view below is coming in from the entry way and looking at our long, narrow living room. To soften the feel of this elongated room,
I decided to make the blue wall a major focal point - something to grab
you upon entering. I also wanted a more neutral tone-on-tone look, so
the blue had to go.
 |
| Before - Blue focal wall on the far side of out long narrow living room (coming in from the entry way) |
I found a perfect shade of brown paint- it was a $5 can of mistint paint at the local hardware store. (Tip #1: The mistint shelf is always a great place to start when looking for a paint color!) Then I hung framed pictures that we already had to add a big impact to our focal wall. (Tip #2: Lay out your arrangement on the floor under the wall you are hanging them on first - to figure out spacing and balance before you hang them on the wall.)
After - Focal Wall
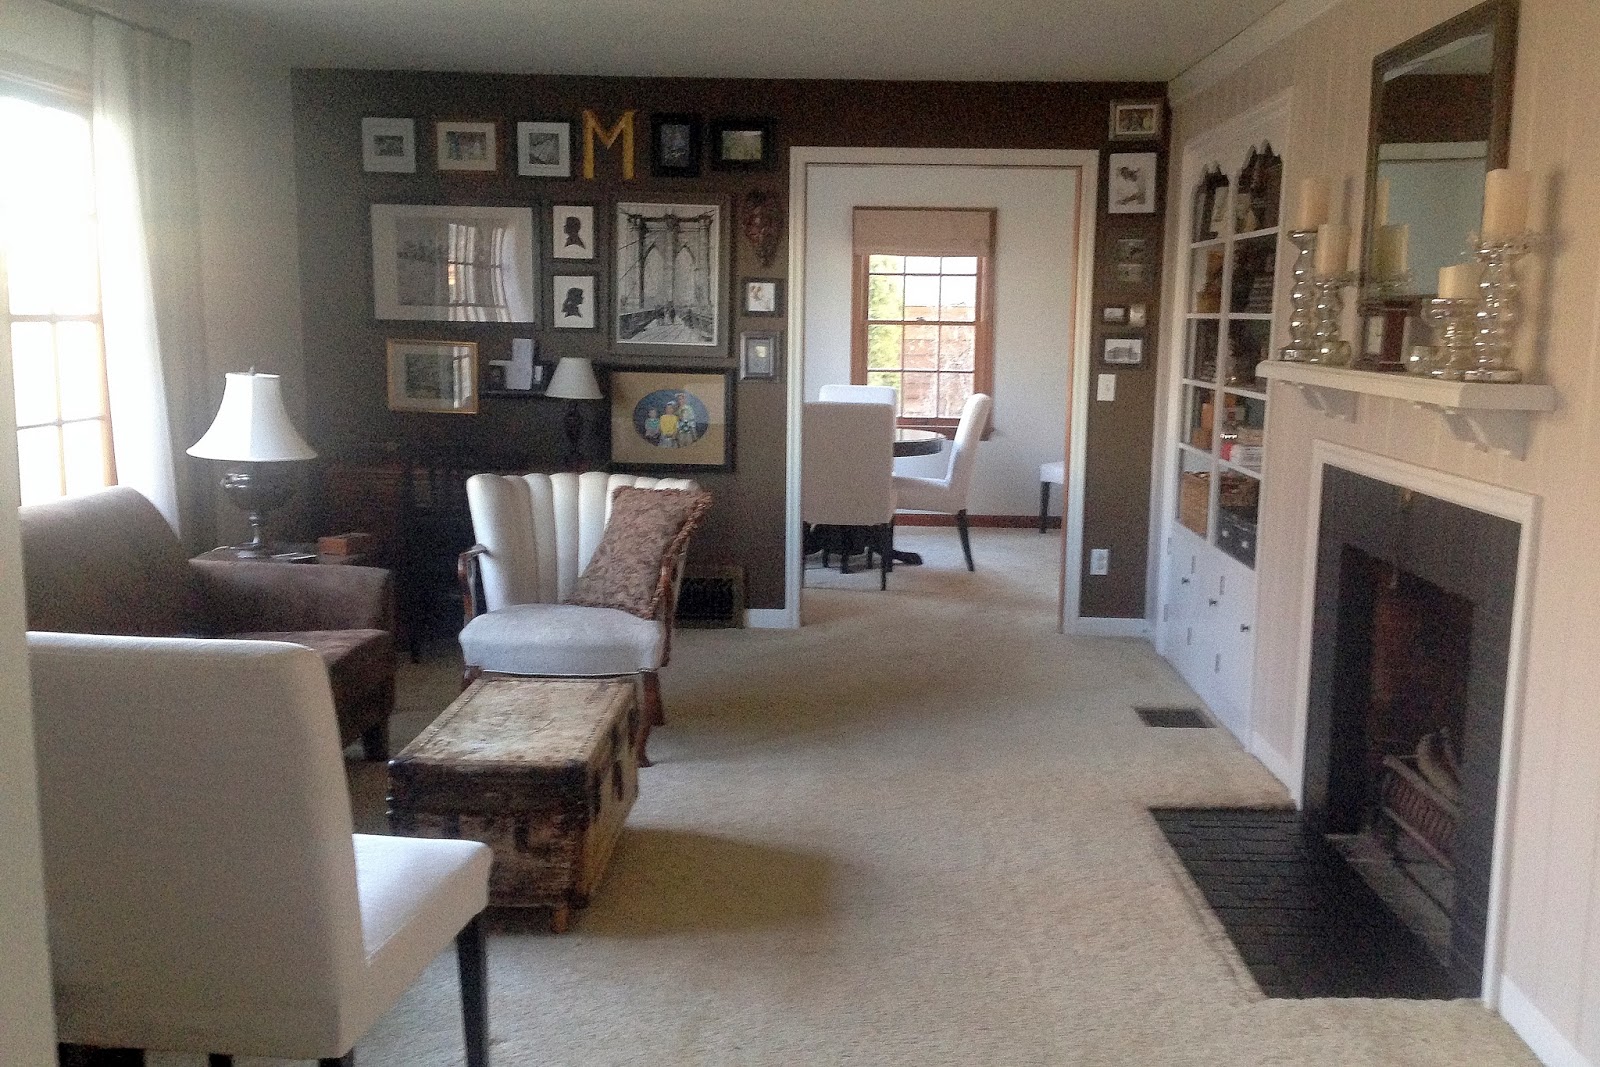 |
| After - We painted the focal wall brown & added tons of family & architectural pictures. |
Before - Fireplace Wall
The knotty pine paneling and scalloped trim are original to the house, but too dark and dated for us. (Tip #3: Don't let original wood be too precious to you. It can be extremely limiting to decorate around. Trim or paneling that is well-painted can freshen a space up and keep it from looking drab and outdated.)
 |
| Before - Fireplace wall - dated brick, screen, knotty pine and scalloped crown molding |
We sanded & painted the paneling a soft taupe-gray - the
same can of paint that was used on the adjacent walls and in the hallway. We
chose a bright white paint for the trim and built-in shelves. We already had both cans of paint, so the only cost for this project was the heat-resistant black paint on the fireplace brick and tile.
After - Fireplace Wall
 |
| After - We painted the brick black, the paneling soft gray-taupe (like the other walls), & the trim crisp white. |
After - Built In Shelf Redo
The pictures below are of our built in shelves. They were also 100% knotty pine. We painted the exterior a bright white and the interior back of the shelves "Emerald Isle" - another mistint color I found for $5. We still want to remove the scalloped detail at the top by cutting a simpler arch instead.
 |
| After - We painted the interior with "Emerald Isle" mistint paint for a bit of color. |
I love the bluish-green hit of color inside the shelves. It still reads as a
neutral, so it doesn't necessarily pin me down to any one color scheme for
future seasons. Plus if I change my mind, its a simple project to change
out. Here's a close up:
 |
Yes, I still have a few Christmas decorations up. Don't judge. I hate saying goodbye to Christmas decor right away. I'm hoping it can count as "winter decor" until the end of January!
Total Cost of Shelf Redo: $5
We have more we'd like to do in the Living Room! Here's our TO DO list as it stands now:
Remove scalloped trim and scalloped valances over windows$0Sand, prime & paint knotty pine wall and shelves$5- Remove scalloped detail at top of shelves by cutting simple arches instead
Update fireplace (paint brick, tile, trim & remove screen)$35Paint or cover focal wall$5Hang pictures$0- Remove carpeting
- Refinish wood floors
- Add a larger, distressed DIY mantel over the existing one
- Add overhead lighting - ceiling drum fixture like this one below maybe?

We already have a spot wired for it in our ceiling and switches too!

So there is our Living Room "Before and After" pictures - although we are really still in the "During" stage right now. I'll keep you posted as we progress.
Stay tuned for more of our Upstairs on the next post!
Star, your talent never seizes to amaze me. You did a wonderful job of transforming that room into a beautiful, warm, and inviting place. What a gift you have. I look forward to your future projects in transforming your lovely little cottage.
ReplyDeleteThanks Rozanne!
Delete